构建OpenWrt固件的方式有很多,常见的有:Linux中基于源码构建、GitHub Action基于源码构建、Linux中基于imagebuilder构建、Docker中基于imagebuilder构建以及网页基于imagebuilder构建。
以上所说的几种方式大致分为两类:
- 基于源码构建. 优点: 可以魔改整个系统. 缺点: 占用资源大、编译时间长、操作难度大
- 基于官方提供的imagebuilder构建. 优点: 轻量、快速、易用. 缺点: 只能基础的添加/删除插件、调整配置、添加/删除文件
今天要介绍的方式就是这其中最简单便捷的方式,只需要在官方提供的网页上输入需要安装的插件名,以及系统初始化脚本,就可以完成构建,直接下载固件包。
通过OpenWrt官方页面自定义构建
打开OpenWrt选择固件的页面
https://firmware-selector.openwrt.org/

输入设备型号, 软路由一般都是Generic x86/64
选择型号后会列出当前型号的官方映像,如果不需要构建自定义映像,那么直接点击下方下载链接即可下载官方固件。
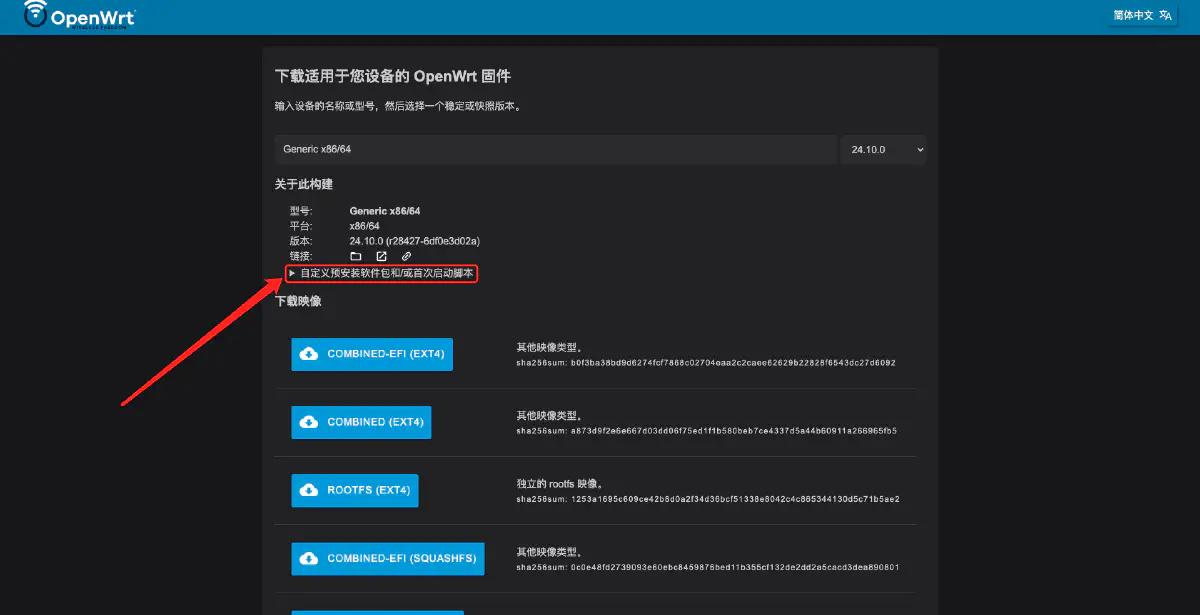
此时点击自定义预安装软件包和/或首次启动脚本
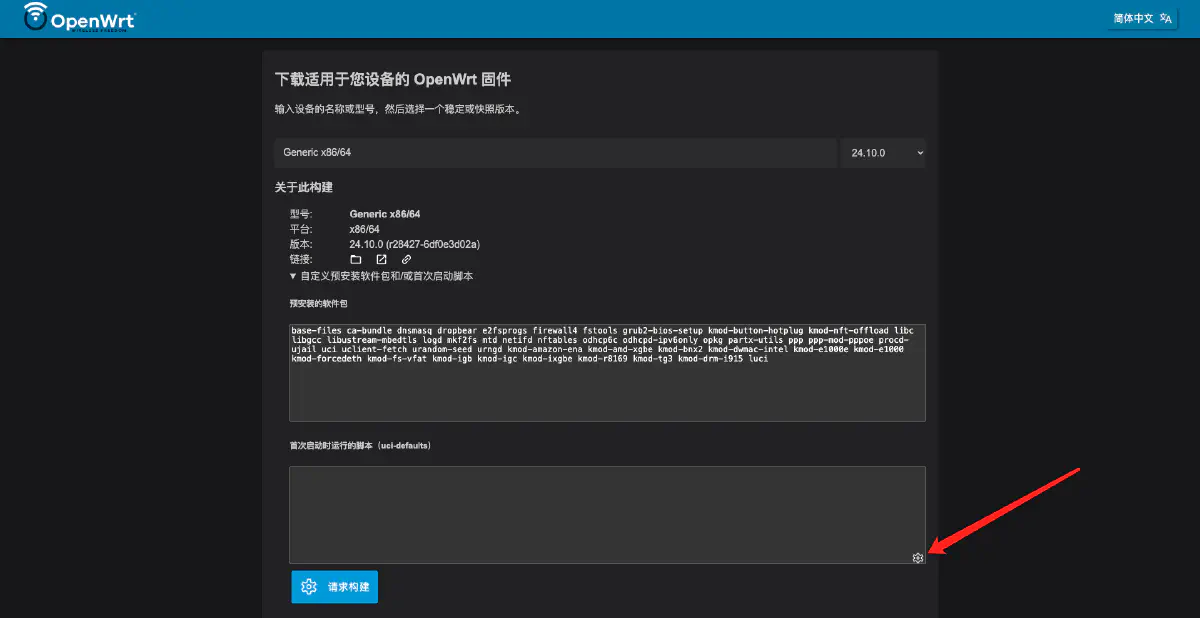
预安装的软件包为当前型号默认安装的,可以适当增删。
首次启动时的脚本仅会在系统初次启动时运行一次,点击输入框右下角的⚙️会给出一个官方示例,也可以从网上摘抄。
调整完毕后直接点击请求构建,等待上方进度条完成,即可在下方下载构建好的固件了。
以下是我的配置,仅做参考
预安装软件包
luci-i18n-package-manager-zh-cn luci-i18n-base-zh-cn luci-i18n-firewall-zh-cn luci-lib-ipkg luci-theme-argon luci-app-argon-config luci-i18n-argon-config-zh-cn bash dnsmasq-full curl ca-bundle ip-full ruby ruby-yaml kmod-tun kmod-inet-diag unzip kmod-nft-tproxy luci-compat luci luci-base luci-app-openclash luci-app-advanced-reboot luci-i18n-advanced-reboot-zh-cn luci-app-ttyd luci-i18n-ttyd-zh-cn openssh-sftp-server qemu-ga
首次启动时运行的脚本
# https://openwrt.org/zh/docs/guide-user/additional-software/imagebuilder

# Beware! This script will be in /rom/etc/uci-defaults/ as part of the image.
# Uncomment lines to apply:

root_password=""
lan_ip_address="192.168.100.1"
rebind_domain="liwt.top"
hostname=""

# log potential errors
exec >/tmp/setup.log 2>&1

set -x

# 设置密码
if [ -n "$root_password" ]; then
  echo -e "$root_password\n$root_password" | passwd root
fi

# 根据网卡数量配置网络
count=0
for iface in /sys/class/net/*; do
  iface_name=$(basename "$iface")
  # 检查是否为物理网卡(排除回环设备和无线设备)
  if [ -e "$iface/device" ] && echo "$iface_name" | grep -Eq '^eth|^en'; then
    count=$((count + 1))
  fi
done

# 网络设置
if [ "$count" -eq 1 ]; then
  uci set network.lan.proto='dhcp'
  uci set network.lan.device='eth0'
  uci del network.lan.ipaddr
  uci del network.lan.netmask

  uci set network.lan6=interface
  uci set network.lan6.proto='dhcpv6'
  uci set network.lan6.device='eth0'

  # 删除br-lan
  uci del network.@device[0]
elif [ "$count" -gt 1 ]; then
  uci set network.lan.proto='static'
  uci set network.lan.ipaddr="$lan_ip_address"
  uci set network.lan.netmask='255.255.255.0'

  # 设置dhcp
  uci set network.wan.proto=dhcp
  uci set network.wan6.proto=dhcpv6

  # 删除br-lan
  uci del network.@device[0]
  # 交换网口, istorem默认第一个口为wan口, openwrt默认第一个口为lan口
  uci set network.lan.device='eth1'
  uci set network.wan.device='eth0'
  uci set network.wan6.device='eth0'
fi

# 关闭lan口IPv6
uci del dhcp.lan.ra
uci del dhcp.lan.ra_slaac
uci del dhcp.lan.ra_flags
uci del dhcp.lan.dhcpv6

# 防火墙允许外网访问
uci set firewall.@zone[1].input='ACCEPT'

# 设置所有网口可访问网页终端
uci delete ttyd.@ttyd[0].interface

# 设置所有网口可连接 SSH
uci set dropbear.@dropbear[0].Interface=''

# 设置DNS白名单, 避免DNS指向局域网地址触发DNS重绑定保护
if [ -n "$rebind_domain" ]; then
  uci add_list dhcp.@dnsmasq[0].rebind_domain="$rebind_domain"
  uci add_list dhcp.@dnsmasq[0].rebind_domain=".$rebind_domain"
fi

# 设置静态地址
uci add dhcp host
uci set dhcp.@host[-1].name='ikuai.lan'
uci add_list dhcp.@host[-1].mac='BC:24:11:12:DF:60'
uci set dhcp.@host[-1].ip='192.168.100.2'

# 设置时区
uci set system.@system[0].zonename='Asia/Shanghai'
uci set system.@system[0].timezone='CST-8'

# 设置主机名
if [ -n "$hostname" ]; then
  uci set system.@system[0].hostname="$hostname"
  # uci set network.lan.hostname="$hostname"
fi

# 设置网络诊断
uci set luci.diag.dns='github.com'
uci set luci.diag.ping='github.com'
uci set luci.diag.route='github.com'

# 应用配置
uci commit

# 替换软件源
cp /etc/opkg/distfeeds.conf /etc/opkg/distfeeds.conf.origin
sed -i 's_https\?://downloads.openwrt.org_https://mirrors.cernet.edu.cn/openwrt_' /etc/opkg/distfeeds.conf

# 替换默认shell
sed -i 's_/bin/ash_/bin/bash_' /etc/passwd

echo "All done."